This tutorial will step through how to use the Window
Declarations Editor built in to PTD. It requires the workspace
created in the first tutorial.
Open the 'Tutorial' workspace created in the first
tutorial (tutorial.pws). Do this by selecting 'File', then 'Open
Workspace' from the main menu. Navigate to the tutorial workspace
and open it.
Currently, the workspace has no window declarations files associated
with it. The script 'hellophantom.psc' uses the Window Declarations
for the PhantomTarget application. This file ('PhantomTarget.dec')
will be opened in the PTD Window Declarations Editor.
Select the 'Declarations' tab in the PTD main window. This will show
the Window Declarations Editor. Currently there are no window declarations
files open in the editor, so it is empty. Open the 'PhantomTarget.dec'
declarations file by selecting 'Declarations' then 'Open' from the
main menu. In the dialog that appears, navigate
to the 'scripts' directory where PTD was installed and select the
'PhantomTarget.dec' file, then click 'Open'.

Notice that now a new declarations element has appeared in the 'Declarations'
tab view. The element represents the full path to the 'PhantomTarget.dec'
declarations file. To see the contents of the file, double-click the
icon to expand the declarations file. (Double-clicking on any element
in the declarations tree will expand or collapse that element). Select
the 'PhantomTarget' declaration after expanding the file element.
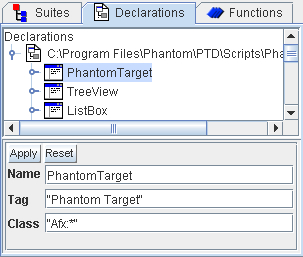
Below the tree of window declarations is an area that displays the
properties of each element. When 'PhantomTarget' was selected, the
window Name, Class, and Tag appeared in the properties area. (For
more information on what these values represent, see 'Window Declarations'
in the Phantom help file.)
Select the top level window 'ListBox' and expand it. It has a child
window called 'Edit1'. This is not a very descriptive name, so the
declarations editor will be used to change its name. Select 'Edit1'.
Its properties will appear in the properties viewer. Change the 'Name'
field to 'ItemEdit'. To activate the changes, click the 'Apply' button.
Selecting a different element in the list will also activate the changes.
If the changes have not yet been applied, clicking 'Reset' will return
the fields to their original values. To make changes permanent, save
the Declarations file by selecting 'Declarations' then 'Save' from
the main menu. Note that a Phantom script will not recognize any changes
to a declarations file until it has been saved.

Once the declarations file has been saved with the changes, the 'ItemEdit'
edit box can be used. Select the 'Suites' tab and open the 'hellophantom.psc'
script associated with the 'Hello Phantom' testcase. A new script
section will now be added that performs some actions using the 'ItemEdit'
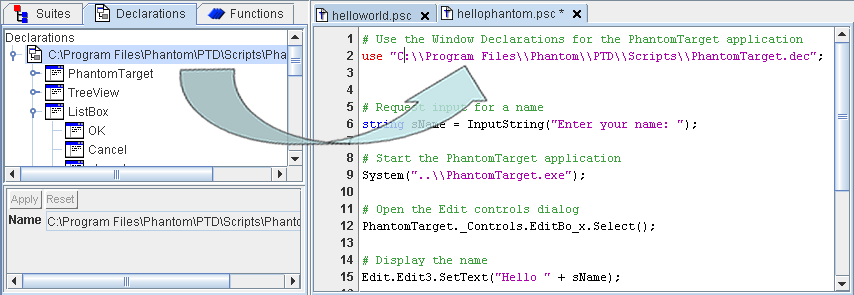
window along with other windows. Window declarations in the Window
Declarations Editor can be added directly to a script. Delete the
line in the script with 'use "PhantomTarget.dec";'. Go to the declarations
editor tab and click and drag the item with the full path to the PhantomTarget.dec
file to the script where the 'use "PhantomTarget.dec";' line used
to be. Notice that a new 'use' statement was inserted into the script
by PTD. Dragging a declarations file from the declarations editor
to a script will insert a 'use' statement, indicating that Phantom
should load this file for window declarations. Save the script.
Individual window declarations can also be dragged in to a script.
Go to the line after 'Edit.Close()' in the script. Enter a new, blank
line. In the 'Declarations' tab, expand 'PhantomTarget' then 'Menu'
then '_Controls' then select '_ListBox'. This represents the 'ListBox'
menu item under the 'Controls' menu in PhantomTarget. Drag the '_ListBox'
to the empty line just created in the script. The entire path to the
'_ListBox' window is inserted in to the script. At the end of the
new line, add 'Select();' so that the full line is:
PhantomTarget._Controls._ListBox.Select();

The 'Select' method will select the 'ListBox' menu item from the 'Controls'
menu in PhantomTarget, and will open a dialog with a ListBox control.
After this new line, create another empty line. In the Declarations
tab, expand 'ListBox' then select the 'ItemEdit' item. This is the
window that was given the new 'ItemEdit' name earlier. Drag the 'ItemEdit'
item to the new line just created. Again, this will insert the full
path to the 'ItemEdit' window. At the end of this line, add 'SetText("Test
Item");' so that the full line is:
ListBox.ItemEdit.SetText("Test
Item");
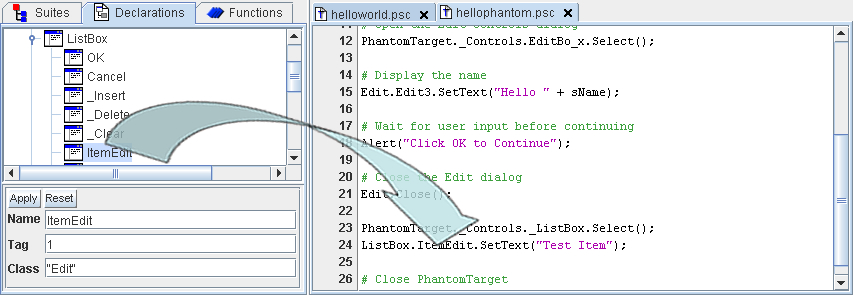
This will set the contents of the window represented by 'ItemEdit'
to "Test Item". Next add the '_Insert' item under 'ListBox' in the
Declaration tab, and add 'Click();' to the end. This will click the
'Insert' button in the ListBox window.
Finally, add a 'Sleep(5);' command after the 'Click();' line. This
will pause the script. This is done just so the window wont close
so quickly and the effects of the new lines will be visible. The entire
script should now look like:
| Example
Code |
#
Use the Window Declarations for the PhantomTarget application
use "C:\\Program Files\\Phantom\\PTD\\Scripts\\PhantomTarget.dec";
# Request input for a name
string sName = InputString("Enter your name: ");
# Start the PhantomTarget application
System("..\\PhantomTarget.exe");
# Open the Edit controls dialog
PhantomTarget._Controls.EditBo_x.Select();
# Display the name
Edit.Edit3.SetText("Hello " + sName);
# Wait for user input before continuing
Alert("Click OK to Continue");
# Close the Edit dialog
Edit.Close();
PhantomTarget._Controls._ListBox.Select();
ListBox.ItemEdit.SetText("Test Item");
ListBox._Insert.Click();
Sleep(5);
# Close PhantomTarget
PhantomTarget.Close(); |
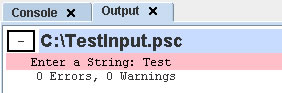
Save the script and run it by selecting
'Run' then 'Script' from the main PTD menu.
The script will do its normal functions (remember, it will ask for
input), and at the end it will open
the ListBox dialog and perform the new functions. Finally, it will
pause for 5 seconds, then close PhantomTarget.
This tutorial provided a brief overview of how to edit and use Window
Declarations with the integrated PTD Window Declarations editor. See
'The Window Declarations Editor'
for more information.
The next tutorial will describe
how to use PTD's built-in Phantom script debugger.